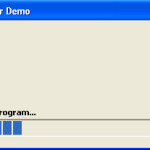
This tutorial will teach us on how to create a progress bar in Visual Basic 6
Kindly follow the step by step tutorial on creating a progress bar in visual basic 6
1. Open your visual basic 6. Create a new project and select Standard EXE.
2. By default there is only one Form (Form1). Rename the Form1 into ProgressBarFrm.
3. Before we create a progress bar, we must include Microsoft Windows Common Controls 5.0.
4. To include that component kindly go to Project in the menu bar and select Components.
5. A dialog box will appear. There are cases that you have to select from these controls:
Microsoft Windows Common Controls 5.0 (SP2)
Microsoft Windows Common Controls 6.0 (SP6)
Kindly select or check only one from the above lists.
6. After you have checked the component, click OK.
7. In the tool box of your visual basic, as shown in the image below you have noticed that there are additional objects added.

8. This object is the progress bar ![]() . Drag this to your form.
. Drag this to your form.
9. Rename the name of progress bar into pLoader.
10. We also need 2 Label and a Timer.
11. Rename the first label into lblPercent and the rename the other label into lblLoad.
12. Set the interval of the timer into 50.
13. Add the codes below in your form.
Private Sub Timer1_Timer()
pLoader.Value = pLoader.Value + 1
       lblPercent.Caption = pLoader.Value / pLoader.Max * 100 & " %"
        If pLoader.Value > 1 And pLoader.Value < 30 Then
            lblLoad.Caption = "Loading program..."

        Else
            If pLoader.Value > 30 And pLoader.Value < 60 Then
            lblLoad.Caption = "Loading components..."

        Else
            If pLoader.Value > 60 And pLoader.Value < 90 Then
            lblLoad.Caption = "Loading database...please wait"

        End If
        End If
        End If
            If pLoader.Value = pLoader.Max Then
                Timer1.Interval = 0
                Unload Me

            End If
End Sub
14. Test the project by pressing F5.
The value of the progress bar will start at 0 and will increment by 1. The default max value of the progress bar is 100 and when it reaches 100 the form will automatically unload.
Hope you have learned something from this.

